Mastering your camera’s settings can unlock professional-level photography in just about 11 minutes. This guide strips away the jargon to show how specific modes and adjustments directly shape your final images, turning ordinary snapshots into something you’ll actually want to frame.
18. Auto Shooting Mode
Your camera’s training wheels mode decides everything for you.
Most cameras offer an ‘AUTO’ setting, which sounds like a shortcut to effortless photos but often traps beginners. This mode puts the camera’s brain in full control, dictating shutter speed, aperture, and ISO. While this fully automatic mode aims for a generally balanced exposure, it leaves you with zero say in creative choices like depth of field or motion blur.
For anyone looking to move beyond snapshots and actually craft an image, you’ll quickly find its limitations feel more like a cage than a convenience.
17. Shutter Priority Mode (S/Tv)
You control motion; the camera handles the rest.
Stopping a hummingbird’s wings mid-flight requires a shutter speed of at least 1/1000 s, and that’s where Shutter Priority mode shines. On your camera dial, it’s usually labeled ‘S’ for Nikon or Sony folks, or ‘Tv’ if you’re a Canon loyalist.
Want that silky smooth waterfall effect? You’ll dial down the speed to something like 1/30 s. The camera smartly handles the aperture to nail the exposure, so you can focus on managing motion.
16. Aperture Priority Mode (A/Av)
Your gateway to controlling background blur and depth.
Photographers who want to control background blur, or bokeh, often reach for Aperture Priority mode. Here, you pick the aperture and the camera handles the shutter speed. A wide-open aperture, like an f/1.8, creates that creamy, out-of-focus background that makes your subject pop, perfect for portraits.
Flip it to a narrower aperture, say f/11, and you get a much larger depth of field, keeping everything from foreground to distant mountains in sharp focus. This mode, often found as ‘A’ or ‘Av’ on your camera dial, hands you the reins for artistic depth without demanding you play meteorologist with exposure settings.
15. Manual Mode (M)

Total creative control for those who want to call every shot.
Manual mode is where you become the director, calling the shots on shutter speed, aperture, and ISO—the core trio of the exposure triangle. The camera’s internal light meter acts as a humble suggestion box, indicating proper exposure without lifting a finger to change it.
Manual mode truly shines when you have meticulous control over your environment, like in a studio setup, during a time-lapse sequence, or when executing long exposures. It’s the mode for those who believe the best way to get the shot is to dictate every single parameter.
14. Shutter Speed
The difference between freezing time and letting it flow.
Fast shutter speeds, like 1/500 s and above, freeze motion dead in its tracks. On the flip side, slower speeds, say 1/30 s, let motion blur creep in, giving you that cool streaky light effect from car headlights at night, or making water look like silk.
Most seasoned photographers swear by keeping your shutter speed at or above 1/60 s when shooting handheld, unless you’ve got a tripod or some serious stabilizer tech. It’s one of the three fundamental settings that control how much light hits your camera’s sensor.
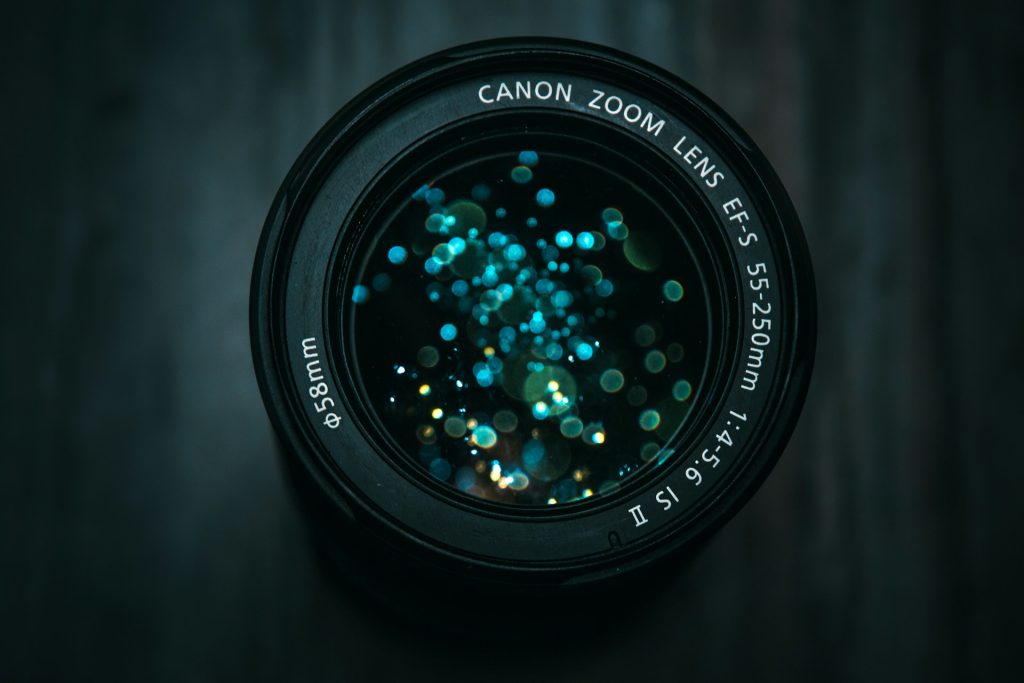
13. Aperture (Lens f-stop)
Your creative control over what’s sharp and what’s beautifully blurry.
Aperture controls the size of the opening within your lens. A wide aperture (low f-number, like f/1.4) allows maximum light and creates shallow depth of field where only your subject is sharp. This is why portraits shot with wide apertures have that dreamy bokeh effect.
A higher f-number, say f/16, means a narrower opening that increases depth of field, keeping more of your scene sharp—perfect for those sweeping landscape shots where you want every distant mountain peak crystal clear.
12. ISO Sensitivity
Your sensor’s willingness to get bright, with a price.
Anyone who’s fiddled with a camera knows ISO is where the magic, or mess, happens. Crank it up to ISO 3200, and you can shoot in near darkness, but digital grain makes your photos look like they were dug up from a dusty attic.
Keep it low, like ISO 100, and your images stay clean and sharp, but you’ll need more light or a longer exposure. Most photographers try to keep that ISO dial as low as possible, only nudging it higher when the light truly betrays you.
11. Evaluative / Matrix Metering
Your camera’s best guess at balanced exposure across the entire scene.
When a camera analyzes the entire frame, breaking it into zones with complex algorithms, it’s using evaluative (Canon) or matrix (Nikon) metering. This default mode aims to balance the highlights and shadows across the scene, generally providing a sensible exposure.
However, if you’re shooting a subject against a blindingly bright sky, don’t be surprised if this mode gets fooled, potentially leaving your subject in the dark or the background blown out.
10. Spot Metering
Precision exposure reading from just a tiny slice of your frame.
When precision is paramount, spot metering scrutinizes just 1% to 5% of your frame, usually linked directly to your active focus point. It’s your best friend when dealing with scenes where a subject’s brightness wildly clashes with its backdrop.
The catch? You’d better know exactly what you’re metering on; accidentally reading a deep shadow or a blinding highlight is like performing surgery with a butter knife—messy and potentially disastrous.
9. Center-Weighted Metering
The middle ground that gives extra attention to your main subject.
Center-weighted metering gives most of its attention—typically 60-80% of the metering weight—to a central zone, making it a reliable choice for portraits or when your main subject is planted firmly in the middle of the frame.
Unlike fancy modern modes that try to be slick scene detectives, this method often proves more predictable when the lighting gets wild, ensuring your subject isn’t blown out or lost in shadow.
8. RAW Image File Format
Maximum quality and editing flexibility for serious photographers.
RAW files capture every speck of light and color detail straight from the sensor. This means you get the highest possible dynamic range and color depth, allowing you to tweak exposure, white balance, and contrast in editing software without turning your photos into a pixelated mess.
While these files are chunkier than typical JPEGs and require specific software to view, they are the professional’s secret weapon for dramatic landscapes, nuanced portraits, or any shot where maximum editability is key.
7. JPEG Image File Format
Ready-to-share convenience with built-in processing.
Anyone who’s ever frantically needed to share a photo straight from their camera knows the relief of a JPEG. This format packages in-camera processing—think sharpening, contrast, and color tweaks—into a ready-to-go file using lossy compression.
Pushing edits too hard on a JPEG is like trying to uncrumple a piece of paper you’ve already smoothed out; the artifacts become obvious fast. It’s perfect for quick turnaround events or when storage space is limited.
6. Autofocus One Shot (AF-S / One Shot AF)
Lock focus once and hold it steady for stationary subjects.
One-shot autofocus locks focus the instant you half-press the shutter. It holds that precise point steady, making it ideal for subjects that aren’t going anywhere—static landscapes, carefully posed portraits, or product shots.
This mode lets you nail focus, then recompose your shot before fully committing. It’s the digital equivalent of setting a trap for perfect sharpness.
5. Autofocus Continuous (AF-C / AI Servo AF)
Track moving subjects with constantly adjusting focus.
Continuous autofocus keeps adjusting focus as long as you hold the shutter button halfway down, meaning your fast-moving subject stays sharp. Think sports, wildlife, or that toddler who just discovered the zoomies.
Combined with burst shooting, AF-C means you can rattle off a sequence of shots while the camera works relentlessly to keep your subject in crisp focus throughout the entire sequence.
4. Drive Mode – Single Shot
One deliberate frame at a time for thoughtful composition.
Single shot drive mode captures just one image per press of the shutter. This deliberate pace is ideal when your subject isn’t going anywhere fast, like a still life arrangement or architectural detail.
After each exposure, the camera usually gives you a quick peek at your work, reinforcing the intentional rhythm of this mode and encouraging thoughtful composition.
3. Drive Mode – Continuous / Burst Shooting
Rapid-fire capture for fast action and fleeting moments.
Modern cameras can shoot up to 30 frames per second, capturing multiple images while you hold down the shutter button. This rapid-fire capability ensures you get the shot when perfect moments flash by in the blink of an eye.
Many cameras offer variations, from a casual 4 fps to those blistering speeds, giving you control to nail that fleeting expression or epic sports play.
2. 3×3 Grid Lines (Rule-of-Thirds Grid)
Built-in composition guidance for more engaging photos.
Many cameras can overlay a 3×3 grid in the viewfinder or LCD, dividing the frame into nine equal rectangles. This grid supports the rule of thirds, placing key subjects along the grid lines or at their intersections to create more balanced, visually engaging images.
Anyone who’s scrolled through endless phone pics knows the struggle of a crooked horizon or a subject crammed into a corner. This simple grid overlay is your shortcut to photographic polish.
1. Electronic Level / Horizon Level
Digital precision for perfectly straight horizons and verticals.
Many cameras now include an electronic level that uses internal sensors to show precisely when your camera is tilted. It helps you nail those straight horizons and perfect vertical lines right in the viewfinder or LCD screen.
By using the in-camera electronic level, you preserve your intended shot and make your work look far more professional straight out of the camera—no cropping required.